Thursday, 30 October 2014

Magazine file cards

As promised, I have a few cards to show that I made to pop in the magazine file that I made for a friend.  

I was really happy with these first two.  They actually look so much better in real life rather than in these photos.  I have stamped the flourish from Baroque Motifs on here and then heat embossed in white, and then sponged over the corner with Pool Party to show off the flourish a little more.  There are two layers of Flower Shop flowers and then one of the stamps from Everything Eleanor was stamped behind.  A handmade button and string added and then a sentiment.


And this one uses the images from Postage Due stamped on Smoky Slate and heat embossed with white powder again, add some ribbon and a few "stamps" on top.  I really love this one - it's just a shame the image isn't a little bigger to cover the whole card.  But then I guess I would say it was too big.  


And last one for today, with Grunge Rock, probably something similar to what's already been seen on here, this time using Indigo Island cardstock. 


Another favourite to come.  Actually looking at all the cards I made, they are nearly all made with retired sets.  There are some sets I just can't part with. 

Tuesday, 28 October 2014

Magazine file card holder

I have had a very creative day today.  Apart from two loads of washing, the day has been spent in my room making things.  A friend from work helped me out last week, so I needed to make something for her to say thank you.  As she has bought a few cards from me in the past, I thought I would make a few cards for her and also a box of some sort to store them in until needed.  

I had printed out some instructions for what is called a magazine file ages ago, but unfortunately it was by an American demonstrator and therefore all measurements were suited for their sized cards which are smaller than our A5 size.  So with a bit of tweaking, this is the end result. 


The holder is 17 x 12 and 4 cm wide, and at the moment it holds 7 cards and envelopes.  I pulled out some First Edition DSP that I had stashed away to use as decoration.  I like this holder so much, that I plan on making a few more for myself.  Such a fun way to spend a day.  

Interested in seeing the cards?  Pop back again on Thursday.  


Thursday, 23 October 2014

Christmas card Class - Holiday Home

I really loved the Holiday Home set when I first saw it in the catalogue, but wondered whether I would really get much use from it.  I'll pop up a few other cards using this set later, but you can use this set for a few different occasions.  You may recall a "Welcome to your new home" card I posted a few weeks ago.  Well, this is the Christmas version.  

We all struggled a little making this card.  The hardest part was getting the post it notes evenly arranged to form the mask before we started sponging.  Once that was done though, it was pretty straight forward.  I have used Night of Navy, then Marina Mist and finally Bashful Blue sponging for the background scene over a circle mask for the moon.  And because we were using photopolymer  stamps, we were able to make Santa and his sleigh travel in an arc instead of straight across.  


Yes, that is a smudge above my sleigh.  I must remember to pop the cards in plastic before class so they don't get damaged. Never mind.  

Tuesday, 21 October 2014

Christmas card class - Bright and Beautiful Stars

I'm back with another couple of cards from our class a few weeks ago. Bright and Beautiful is another very popular set from the Holiday catalogue, and what's not to like.  These stars look so "beautiful" when embossed, but are every pretty specky when they are not.  

For my card I chose to emboss with silver powder, and then added some silver sparkle behind in a larger size star with the framelits that match.  I wanted to use a "regal" looking colour as the card base, so chose Night of Navy.  At the class, I gave people their choice of cardstock colour to use, and also had a few different designs of cards using the stars, but most chose to replicate this one.  Makes you feel good when they do that.  


Thursday, 16 October 2014

Christmas card class 2

Ready for another Christmas card, or am I just reminding you how soon Christmas will actually be here?  Drove past the local school in the holidays and they were counting down the days till Christmas.  Bit sad when the kids hadn't even come back from their break. 

This card was my next favourite from Saturday.  So simple, but looks good.  This was a combination of two ideas, the washi tape from Michelle le Breton, and another from Pinterest that I can't find now.  

When I first saw the washi tape in the catalogue, I wasn't really impressed.  But, it's actually not bad.  Easy to use and even though these colours are quite subtle, it's a good effect.  

I always knew I would have to purchase Endless Wishes stamp set right from the start, even though it doesn't really suit our Aussie Christmas theme.  There are a lot of sentiments in this set for Christmas which can be re-arranged to make lots of different greetings. 
So three levels of washi and some stamped snowflakes, with one and the greeting embossed in silver.  Add a bit of bling, and ... nice!


Tuesday, 14 October 2014

Christmas card class

We had our (maybe) final card class for the year on the weekend, and of course the theme had to be Christmas cards, so some of the products in the latest Holiday Catalogue from Stampin' Up got a bit of a work out.  

The first card was my favourite.  It was cased from Michelle Andrews and as I loved the design so much, I copied it down to the last detail, inside and out.  Have a look at her blogsite for a couple of great ideas using the Festival of Trees set.  


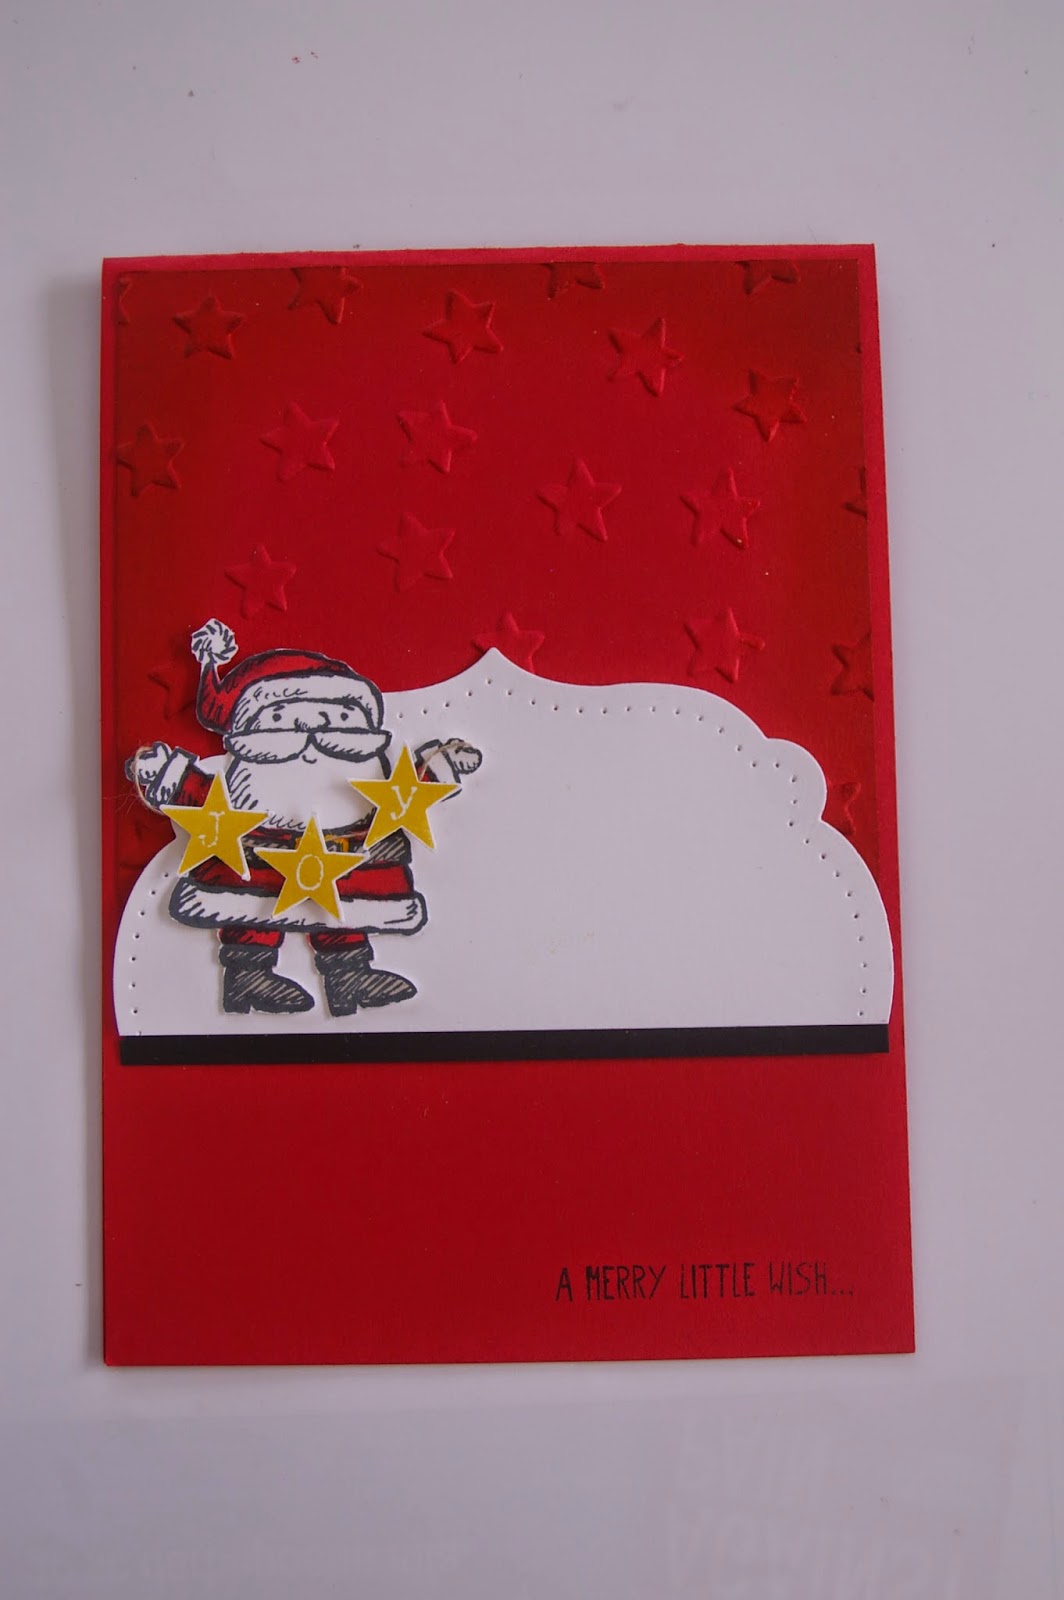
The embossing folder is a new one too for Christmas - Lucky Stars, but you could also use this for birthdays, or pretty much any occasion where you want to add a bit of texture.  Santa has been coloured in with Cherry Cobbler Blendabilities, which I am just starting to get the hang of, and the JOY banner popped up on dimensionals.  

As I said, my favourite, so thanks Michelle for the idea.


Thursday, 9 October 2014

Curvy Keepsake box

Last week we also got to have a play with the Curvy Keepsake Box Thinlits Dies and make this cute little penguin.  There are so many cute little animals being made with this box floating around Pinterest, and I am tempted to add this to my wish list.  
 

Now this little box was made with the Gift Box Punch Board, and using this you can make lots of different sized boxes, up to 10.2cm each side.  Ours was made with a 15 x 15 cm (6 x 6 inch) square and Michelle gave us all a little candle to pop inside as a gift. 


There is no glue or tape needed with this box, as you can see it all just folds together and has little slits to hold it together.  What do you think?  Do you need it now?

Get togethers with other demonstrators are a great idea.  At this occasion I got to use lots of things I didn't own, hadn't done before or was considering buying.   

Tuesday, 7 October 2014

Christmas cards

I was fortunate last week to be able to get together with a group of Stampin' Up demonstrators to share some ideas and create a few cards.  This week I will be showing you what we made there, which hopefully may give you some ideas for your Christmas cards, or at least showcase some of the products from the latest Holiday Catalogue. 

This first card uses the Ornamental Pine set, one I'm still debating over whether I really "need".  Instead of a white background, Michelle used Naturals White cardstock for a softer effect.  Lots of sponging around the edges also help with the vintagey feel.  Pine cones and tag have been popped up using dimensionals, and the rhinestone was coloured with one of the blendabilities to tie in with the colour scheme. 


Next card by Naomi uses the very popular Festival of Trees set, one that also has a matching punch to make everything so easy.  The dots are stamped on in Whisper White for a lovely subtle background effect, and the cardinal has been stamped and once stuck in place, we used Glossy Accents to make it stand out and shine. 


Now this one was a little bit more of a challenge, and one that I didn't quite meet on this occasion.  It's done with brayering, and I have never used a brayer before, so I don't actually like the way it turned out, but Angela's card looked so much better.  The brayering was supposed to have been a little more gradual and show more colours, from Cajun Craze, to Pumpkin Pie and finally Daffodil Delight.  The set is called Beauty of the Season, another one I debated over.  Once the image was stamped, we coloured him completely with a black marker and also a few of the blossoms on the branch to give the night effect.  The lines you can see are supposed to be beams from the moon, but you are forgiven if you thought it was just a mistake.  I think I need more practice. 


Will show you some cute little boxes we made shortly. 

Thursday, 2 October 2014

 Just a quick one today cause I forgot to take photos of cards in the daylight, and the night ones weren't the best quality.  

My card has been made with one of the recent additions to Stampin' Up - photopolymer sets.  These are stamps made of a clear material, which is great because as it's clear you can see where you are placing the stamp and therefore don't need to use a stamp positioner for perfect placement.  Another great thing is that you can reshape the polymer and can bend them when placing on your clear blocks.  I'll show you a "bent" one shortly.

 
This was just a simple card to make, add the border, colour with markers and fancy up the edge. 

Tuesday, 30 September 2014

Here comes Santa Claus

Do you have a song running through your head now after reading the title of my post today?   Apologies for that, but it describes the card I have made just perfectly.  

When I looked at the stamp set "Get your Santa on" I thought how good it would be if Santa could come down the chimney and into the fireplace.  Well I haven't figured out the chimney bit, but here is the fireplace part.  It's still a work in progress.  

 See, empty fireplace ....
 Here he comes ....
 Touchdown

As I said, I'm still playing around with him, but having fun.  In the first photo you'll notice the black tab at the top.  This is the bit that slides up and down with Santa attached.  Fun.


Thursday, 25 September 2014

Welcome card

A friend of mine bought a new house up the coast, and gets to spend the weekends away by the water.  Doesn't that sound peaceful?  My card to her was overdue, so had to be a quick one so I could get it in the mail fast.  I saw a card similar to this on my travels through Pinterest and had to change the colours to suit her taste.  The little house is one from a new sets in the latest Stampin' Up catalogue, Holiday Home.  The set is more suited to the American market with Halloween and Thanksgiving images, but we Aussies have learnt to be adaptable.


Tuesday, 23 September 2014

Everything Eleanor

This is the last card made a few weeks ago at our stamping day.  The colour is a little dull in the picture, but we used Strawberry Slush which normally is a very  bright pink.  The swirl from Everything Eleanor has been stamped on the Strawberry with VersaMark to give a subtle background effect, and then stamped again on white and embossed for the top piece.  Do you like that shape for the white?  It's done using one of the frames from Labels Collection dies but cut on only the one side.  Add a little border of DSP, one of the flowers from the Eleanor set and a touch of bling, this time black rhinestones.  


Think I might be making a few more of this design in the future. 

Thursday, 18 September 2014

Father's Day viewing

I know Father's Day has long gone, but this is the card that winged it's way up to my Dad.  


A little bit like another one you have seen, but a few differences.   I had this card sitting on my desk ready to go long before Father's Day, but unfortunately it just sat there looking at me and I didn't remember to post it until the Friday before.  I still love you Dad, even if I am a bit slack in the mailing department. 

Tuesday, 16 September 2014

Wedding cards

I know, I had a little time off.  Had to have a bit of surgery on my face last week and wasn't really in the best frame of mind to blog, or pretty much do anything.  But am on the mend and stitches out now, so move on.

Have been making a few wedding cards lately for people at work and here are a couple I have photographed.  

For the first card I was told something bigger than a normal card and not too bright.  So this is a DL size card in Very Vanilla with a little stamping in VersaMark of my new favourite swirls from Everything Eleanor, a doily, some seam binding ribbon and a strip of beautiful vintage ribbon that I found tucked away. 


For this next card I was asked for something for a young couple, a little more modern.  I cheated a little and used an idea of a friend of mine with the names on the card and spent ages trying to lengthen the shape of the Adorning Accent Framelit.  I was happy with the final product. 


Last one,I don't know why it flipped, but I can't unflip it after a couple of tries.  This one the colour matches the bridesmaid's outfits and is embossed in silver and sparkles. 


Thursday, 4 September 2014

Class cards

On Saturday I had another card day where everyone had the chance to use a couple of my recent purchases.  

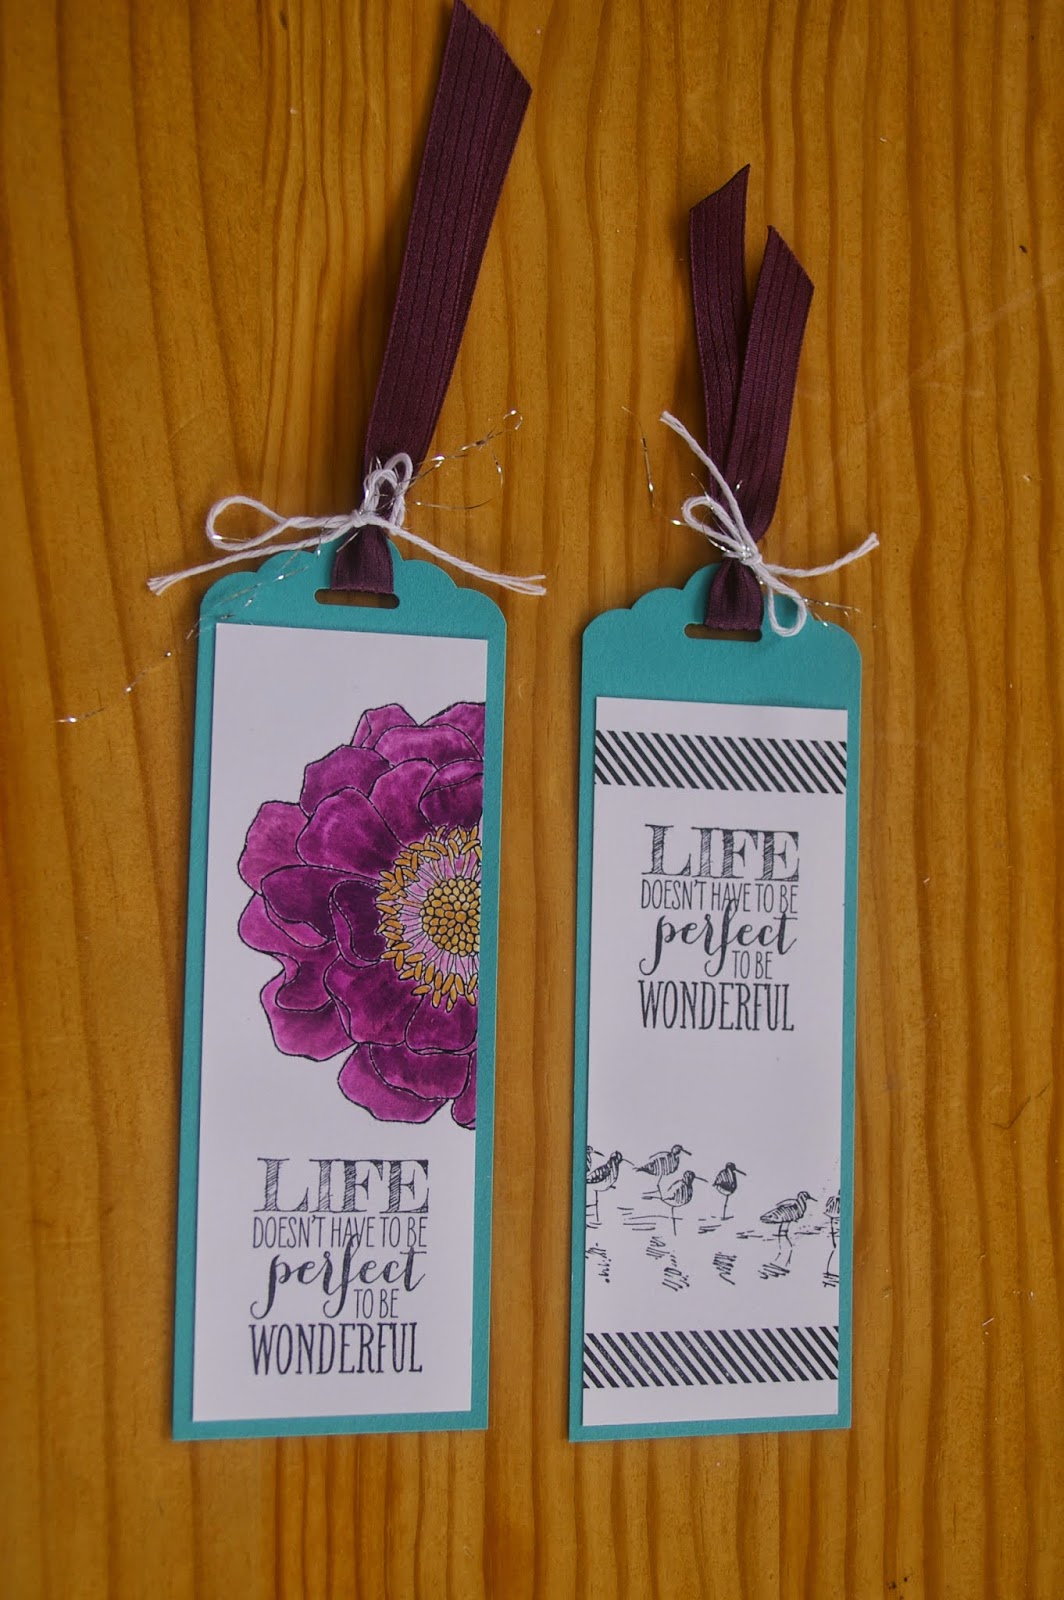
First off people had the chance to make a bookmark of either design below using the Scalloped Tag Topper.  There are some great projects being made using this punch floating around on the internet, and these two are just simple ones.   


 Next up was a card with the Tag Topper used as a closure.
   

And this one was just to show a cute little box made with the punch. 


This is just an interesting fact, but recently when I looked at my Audience traffic on here which shows me the country that people come from who have looked at my blog over the last month, the view count from Turkey was more than from Australia.  I'm not sure why, but I googled some Turkish words and lütfens and teÅŸekkür ederim, which hopefully means hello and thank you.

Tuesday, 2 September 2014

Another succession of birthdays

Yesterday was the 1st September, and do you know what significant event occurred on that date?  Well, it was the first of Spring, and we did have such a beautiful day, but that's not what I'm thinking of.  Yesterday was my husband's birthday.  He was actually born many years ago on Father's Day.  What a present for his Dad!

So here is his birthday card.  I debate whether to make him one or not as he really isn't into cards.  Horror!