Tuesday, 27 May 2014

Convention update

Last week a friend and I went to the Stampin' Up Convention.  Every year the convention is held in a different location, and this year it was held in Melbourne.  There were around 800 demonstrators and guests there, and the first day was a little overwhelming.  There were talks on ways to improve business of course, but we enjoyed the creative part more, and of course the new stamp sets given out.  Came home with quite a bundle of new goodies which you will see soon.  

A couple of photos to give you an idea of what goes on.  Some were taken on phone so not the best quality. 


Some of the many attendees with their new red convention bag

Inside the auditorium before starting - imagine the noise!

The convention opened with the singing of one of the songs from Wicked by the actress who plays Glinda the Good Witch - we were singing it for days afterwards

Some of the swaps were received - whoever wants to can bring along cards they have made especially for convention and "swap it" with others so they get to take home other demonstrators creations

The creativity begins

Awards night had Bjorn Again as their entertainment and a few of the ladies (and men) came dressed appropriately Abba style

And the best part - a new catalogue. 


Thursday, 22 May 2014

Clockwork Mustard

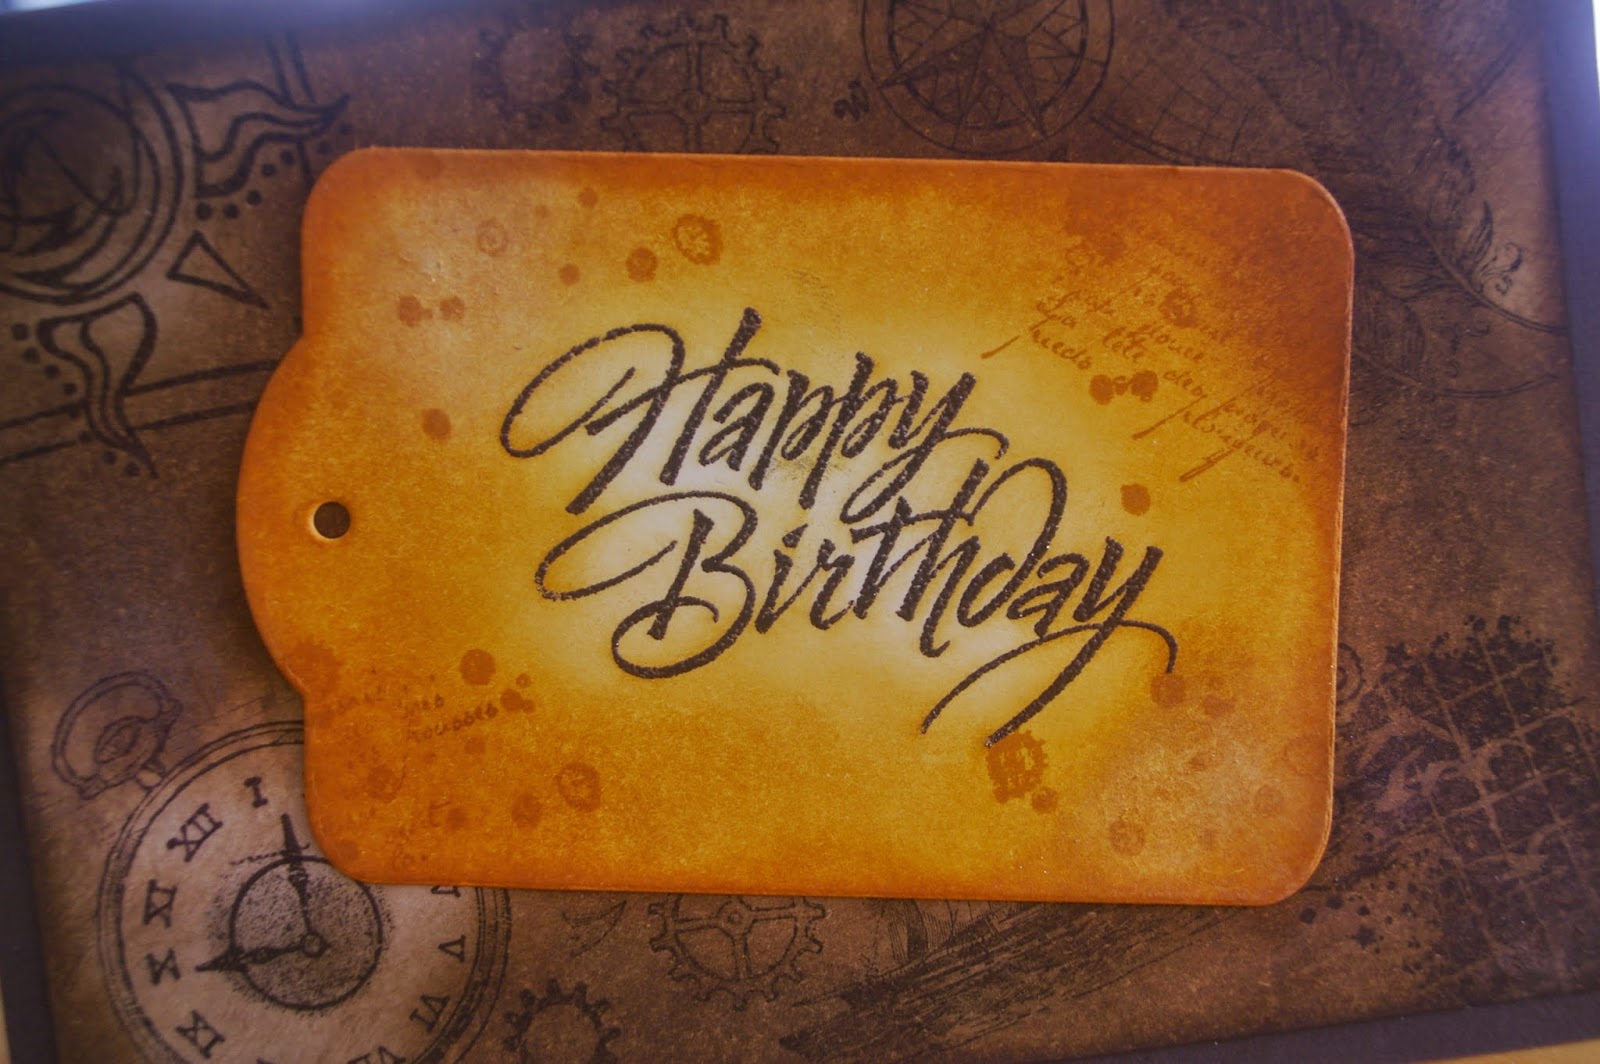
This card was made recently for the birthday of one of my brother-in-law's.  A few people I know weren't too keen on this Clockworks stamp set, but I like it for lots of reasons.  I quite like the splodge and grid lines with seagulls for a little background effect and even though the clock requires three different stamps it's a good one for males.  

And it can also be used for teenagers who love the steam punk stuff. 


Tuesday, 20 May 2014

An oldie but a keeper

There are some stamp sets that I just can't get rid of, and Bliss is one of them.  I think the flourish and the butterfly image are beautiful and can be used on lots of different style cards.  

This time I stamped in Crumb Cake (another favourite) and complimented it with Cherry Cobbler cardstock.  Add a few more butterflies and a bit of sparkle. 


Thursday, 15 May 2014

Black, white and red

Don't you think black and white cards look elegant?  I do, so what happens when you add another colour to the mix?  It turns out like this. 


Made for a friend who recently celebrated her 60th birthday.  Some people like to put big numbers all over their cards, but really, after about the age of 16, who likes to be reminded of how old they are.  I prefer to forget about the numbers and concentrate on the birthday part.  

The Happy Birthday has been "coloured in" with Glossy Accents to give it a shine, and the flowers were sprayed with shimmer for a sparkled.    

Tuesday, 13 May 2014

Mother's Day

Hope all you mums enjoyed your special day and your family spoilt you a little.  We had a lovely family picnic by the side of the Nepean River and took the kayaks along for a paddle.  All the kids had fun sliding down a hill on cardboard, having a paddle and catching up with their cousins too.  Very pleasant way to spend a Sunday, and beautiful weather too. 

This is the card I made for my mother-in-law.  It was photographed early in the morning, so the colour isn't quite true to shade - Wisteria Wonder.  Lots of paper piercing and an embossed white sentiment.  


Monday, 12 May 2014

Another sampler frame

Apologies - this was supposed to have shown up last week, but I obviously did something wrong. 

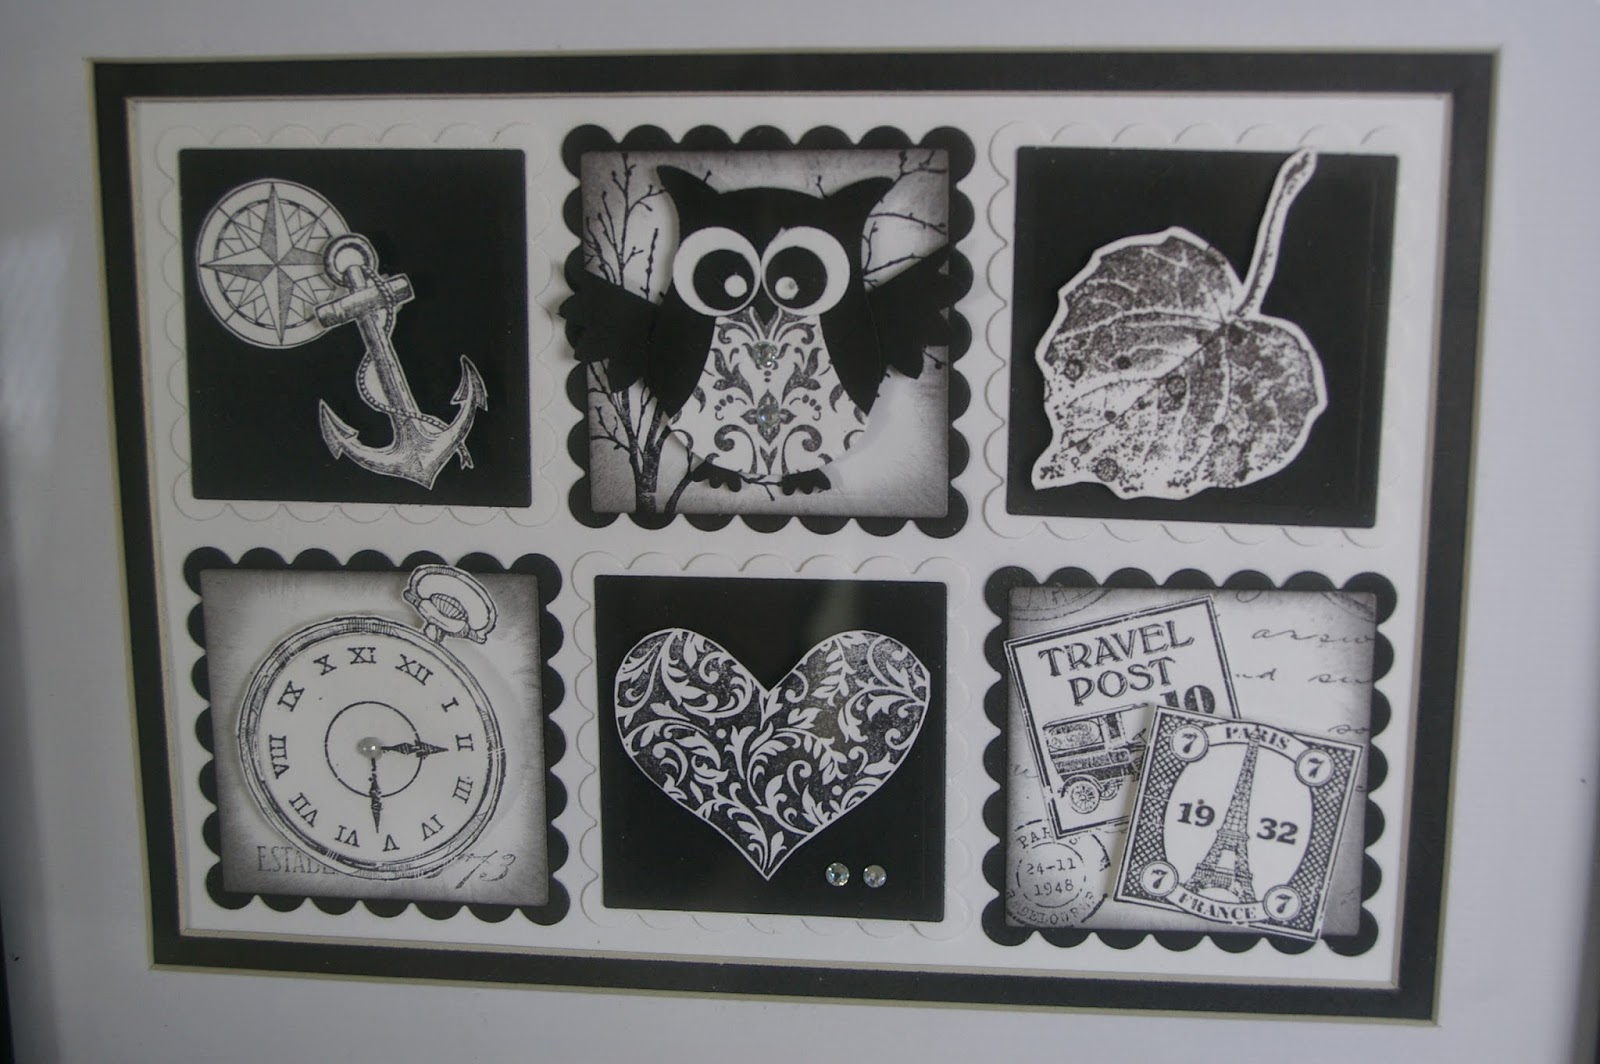
You may have guess by now that I quite enjoy doing sampler frames.  These photos are a combination of two I recently finished as gifts; one for my daughter and the other for a friend who recently had a "big" birthday.  Because I sometimes stress over which colours to use, I decided to stick with a black and white theme for both frames.  I was going to add a pop of colour, but decided not to. 

These frames are 7 x 9 inch (18 x 23 cm) and the photo size 5 x 7 inch (13 x 18 cm).  (I used the inch measurement because I can visualise better in inches - it's an age thing.)  


Stay tuned, cause I still have two more frames to fill.  If you are interested in which stamp sets were used, send me an email for more info. 

Thursday, 8 May 2014

My Dad's birthday card

On Monday my father celebrated his 85th birthday.  Sadly he lives a little too far away to visit very often, so I have to get by with phone calls with him. 

For his card I chose to use the stamps from The Open Sea, my go-to set for male cards.  Cardstock used was Pool Party and Soft Suede, once again, male colours.  And even male cards can have a little bit of bling added. 


Thursday, 1 May 2014

A little vintage style

I quite like the look of vintage style cards and the rich colours associated with it, so tried to recreate the look with this card.  I stamped various images onto white cardstock and then using a dauber began shading.  A little bit of effort involved, but I quite like the finish.


Tuesday, 29 April 2014

Male birthday card

Apologies for my absence last week.  We had a family holiday to Tea Gardens staying at The Boathouse, and I just ran out of time to post before we left.  We have had the best holiday weatherwise for a long time, beautiful sunny days with only one rainy night, overcast day and afternoon sunshine.  Spent lots of time lazing around the pool, got through 3 books and enjoyed a boat ride to Nelson Bay with dolphins frollicking through the water beside the boat on the return trip.  A perfect way to spend a holiday.  But back to reality.  

This is a card made for my nephew who is very into bike riding.  Nothing as boring as riding around roads though.  He loves the mountain bike riding, jumping from rock to rock, sliding down hills and the dangerous stuff.  

I have used a black marker to colour the bike image from Postage Due as I didn't want all the background stuff.  I would have preferred to use the front wheel, middle section and back wheel as a sort of triptych, but there was only half of the back wheel on the stamp.  


Thursday, 17 April 2014

Cardstock Storage

I thought I would share with you today how I store my cardstock.  I used to store it in plastic A4 sleeves in a binder when I didn't really have that big a supply, and then graduated to a plastic storage box picked up in a junk shop as the collection grew.  The basic colours I use the most are in the front of the box; Whisper White, Very Vanilla, Crumb Cake, Smoky Slate and Basic Black, followed by In Colours.  I group my cardstock together in colours rather than colour collections like Brights, Neutrals, etc as I just find it easier to compare colours when grouped together.   

Recently I found side opening clear folders in K Mart*, a little easier than using A4 plastic sleeves as the cardstock slips in on the side (which is at the top of the box).  These hold all my cut into sheets of cardstock so when I only need a small piece it's the first spot I go to.  Stored behind each clear folder is about 6 full sheets of cardstock  and the rest of the packet is kept in a cupboard out of sight to keep the box light and easy to use.  

And then I found Cori Cozak  had printed out a pdf of colour tabs for her storage system which uses the round tab punch.  I guess you could always use any shape punch or cut around them if you aren't lucky enough to have your own round tab punch. 

So now I can see all my colours at a glance.  And it looks pretty too.   


Everyone has their own storage system, but this one works for me.  
 
*OfficeOne 10 pack letter file from K Mart $2.00 for a pack of 10.  Bargain!

Tuesday, 15 April 2014

An envelope pocket

We recently went to an engagement party and as we had already sent a card when we first heard of the engagement, I just wanted to make a simple gift card to go with the present.  I thought an envelope pocket might be the thing, but after stuffing around with various ideas, stamps, inks and frames this turned out to be not so simple.  Firstly I wanted this shape and as I didn't have the dies my very clever hubby drew up the shape for me on computer, then drew a slightly larger size, and I used those shapes as my template. 

So really this card took about 4 hours to make, and then in the end I decided it wasn't "quite right" and made a completely different card instead.   And then forgot to take a photo.  And it was beautiful.  It had two lovely little owls sitting on a branch and their clothing was made using both sides of the shiny wrapping paper.  

I have a spare card now if you want to do something that needs congratulating. 


Thursday, 10 April 2014

A collage type card

Now I really don't know what the correct name for these sorts of cards is - if anyone does, let me know.  I just called it collage because it has lots of different images stamped together.

I have always admired people who seem to be able to put random things together, in any form, and make it work.  So I tried to do that with this card.  It has images from a few different stamp sets all stamped in black, and then a few of them are popped up for dimension.  Was trying to achieve a vintagey type feeling with the shading, but I think it needs a little more.  

As I haven't actually stuck the top panel down yet onto the base card, I think this is one I will go back and have another try at. 


Tuesday, 8 April 2014

Another Great Year copy

I found this card by Alisa Tilsner  on Pinterest recently and liked it so much that I ended up having to buy the stamp to copy it.  I think it was the lovely bright colours that sold it for me. 

This is my version of her card.  I think I still prefer hers though.  Maybe it's the way the sentiment is popped up, maybe it's the colour of the yellow cardstock,  maybe it's the angle of her sentiment or maybe it's the bling.


Thursday, 3 April 2014

It's not a card

No card today, but rather a tag.  I like to make everyone who orders something a little thank you tag, and these are my latest lot of tags.

I think that little rabbit from Baby We've Grown stamp set is so cute, so it was an easy choice for the stamp to pick.  And then as Rich Razzleberry cardstock has been a bit neglected lately it was chosen for the colour.

I was really happy with the way they turned out.  Don't you love it when something just works.    


Tuesday, 1 April 2014

Another card in a box

This is another card in a box made recently for a friend of my sister who is shortly to turn 60.  Not sure about you, but I don't really like putting ages on cards for people over about the age of 15, I guess it just makes me think how old we are all getting, so this box was filled with flowers instead.  The flowers are from Fabulous Florets and Morning Meadow stamp sets, and the colours used were Limeade, Wisteria, Calypso and Summer Sun.  Once again I have put in my three bars across the box cause I just think it fills the space up better. 


I shared these card in a boxes with everyone at the class a couple of weeks ago now and most of them have had a go at making their own creations.  If only I could get to see them all. 

Thursday, 27 March 2014

Blast Off Birthday

This was another fun card to make - called a Crazy Pop Up Fold card and was our card for Jack's 7th birthday.  The idea came from Deb Valder and there is a video for you to watch if you are tempted to try it.  It's an easy one, so give it a go.  

The sentiment on the front acts as the clasp to keep the card closed, but then it folds out lengthways.  The papers are one my mother-in-law gave me a while ago - see I do get around to using things .... eventually.  


I heard Jack liked this one - after he worked out how to open and close it.